

A simple git workflow for beginners.
Version control was never the part of the formal computer science curriculum when I was pursuing my Undergraduate degree.
Seems like it is the same case today, most of the people who are starting out of college don’t seem to know about version control.
This post is aimed towards you, if you have no understanding of Git and starting a job in a workplace where they are using git for managing code.
This article aims at providing you the commands that will help you with your work and a workflow to follow. These will be commands that you run on a terminal so if you are on windows use the git bash(right click in a folder “git bash here”) .
To build your understanding of git you can read more on the official git docs or other tutorials.
1. What is Git?
Consider git to be a database which keeps track of the changes you do to your code and also allows you to share your work easily with others. So before you can do that go ahead and install it on your system.
2. Clone a repository
Usually you would be working on existing code and someone might be sharing a repository link with you. This repository might be hosted on some of the popular repository hosts like Github, Bitbucket etc. Go to the directory where you want to checkout(download) the code and then the first command usually to run would be
git clone https://host.com/path/to/git/repo.git
This will copy code to a directory.
3. Starting working on the code
Run:
git branch
Usually you will see master as the output. This is the “branch” that you are on now. Unless there are other directions given to a you, good idea will be to go ahead and create a copy of this branch, run
git checkout -b dev-your-name
so if your name is Avicii the command for you would be git checkout -b dev-avicii
4. Once you are done with a piece of functionality or at the end of the day.
Once you have completed a piece of functionality it’s time to commit your code.
Check status of the files that you changed with
git status
Now add the files that you really want to share with others using
git add file-name-1 file-name-2 file-name-3
once added run
git commit -m "1234: My commit message"
The text followed by -m is the message that you want to share with other people. Consider it to be a rule to add the ticket number(like 1234 in this case) to your message, if you are using a project management tool(JIRA etc). This will help keep track of the reason why a change was made and details would be in the ticket.
5. Sharing your work with others
Till this point all your changes sit on your local system only, to actually share it with other people you will run :
git push origin dev-your-name
This will push your branch dev-your-name to the remote repository. Now another developer can use this branch.
6. Working on other people’s branch
You might be asked to finish a piece of functionality developed by some other developer on your team. For that you need to “fetch” their code and start working on it. Assuming they also worked a different branch name dev-other-person run;
git fetch
and then
git checkout --track origin/dev-other-person
now once you are done with you changes you run the following sets of commands again
git add file-name-1 file-name-2 file-name-3 #files you want to actually change and share

git commit -m "1235: Changes to Functionality " # your message

git push origin dev-other-person
7. Including other people’s changes in your branch.
You might need code from another branch and you can bring that into your code using
git pull origin other-needed-branch-name
8. Keep in sync with main branch
Usually master(or develop) is the main branch so as mentioned in #7 keep pulling in changes from it daily by
git pull origin master
This is a very important step, I had a case where a fellow developer kept on coding on his branch without syncing with master frequently and when it came to actually moving his code to master, it was a disaster(too many conflicts)
Commands in a nutshell. (Consider your name is Avicii)
# starting from master branch
git checkout -b dev-avicii
# add your files to git
git add file1
# save your changes to git with ticket and message
git commit -m "8328: Changes to user login"
#sync with main branch
git pull origin master
# sharing your changes with others
git push origin dev-avicii
Remember to Push your code daily, when you are on your own branch there is no harm in pushing your branch. It will also save you from losing your work in case of a rare but possible system crash.
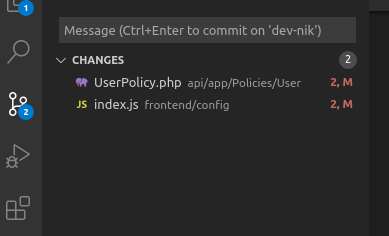
If you are using something like VS Code your life would become much easier as you can visually perform all of the above actions without bothering with the command line
This is a good place to start and get functional knowledge. You can always build up from here, like taking a look at the enhanced git flow